Softsub (.srt) Tutorial
This tutorial aims to help translators who wish to contribute but are not familiar with making softsubs (.srt files).
This tutorial will be done using a free editing software, Davinci Resolve (This tutorial will not go through the downloading/installation of the software).
Note that there may be slight variations across different versions of the software, the version in this tutorial is 17.
Many subbers like to use Aegisub instead, but Davinci Resolve is highly recommeded for those familiar with the standard timeline-based video editors, and it just has a more user-friendly user interface.
However, do note that the file size is large at around 3.5GB, so for those who have PC storage limitations, you may choose to use Aegisub instead.
For more details of PC spec requirements, check this link.
Step 1: Setting up the project file
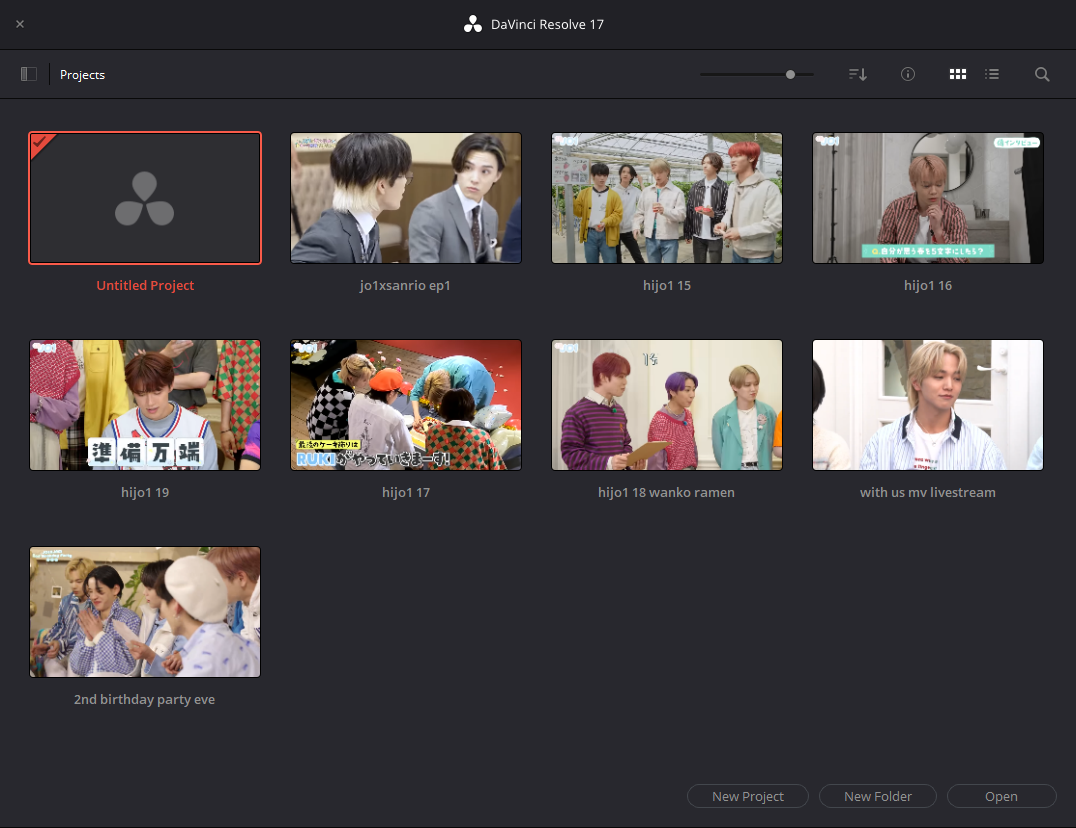
Open Davinci Resolve software and you will be prompted to select an existing or create a new project. Double-click on Untitled Project to start a new project file.
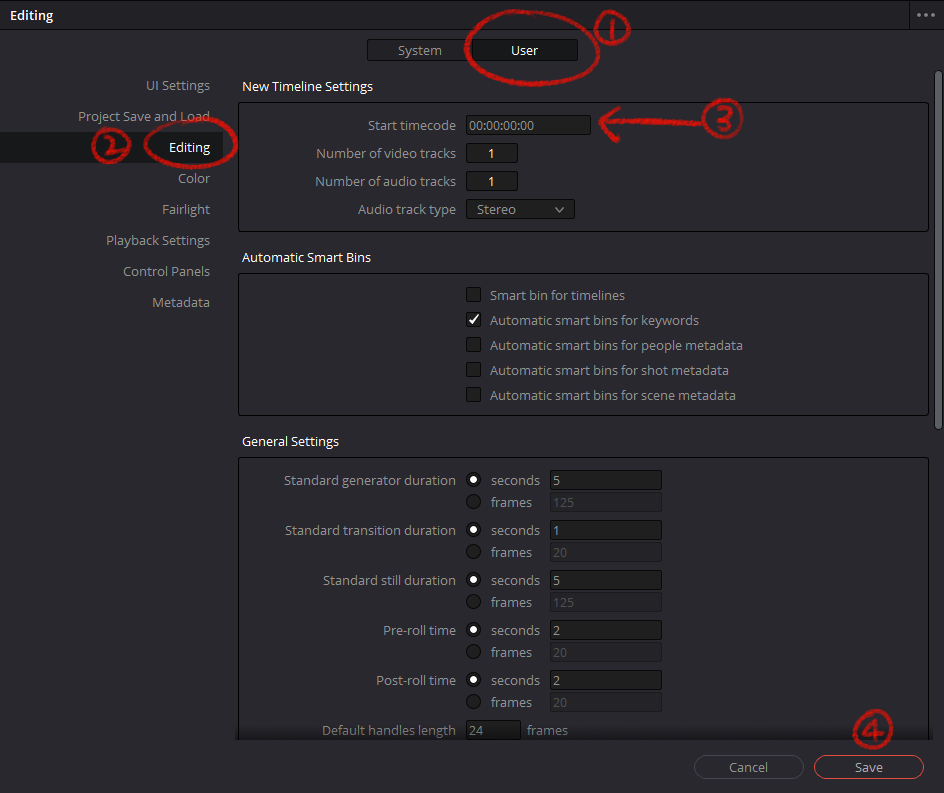
By default, DR timeline starts at 01:00 hr. We want the exported subtitle timing to match the video exactly, so we will shift this default to 00:00 hr (You only have to change this once, and don't have to worry about this in the future!)
On the topmost bar, click Davinci Resolve > Preferences... and in the pop up, select User > Editing, change the Start Timecode to 00:00. Save and you're done.
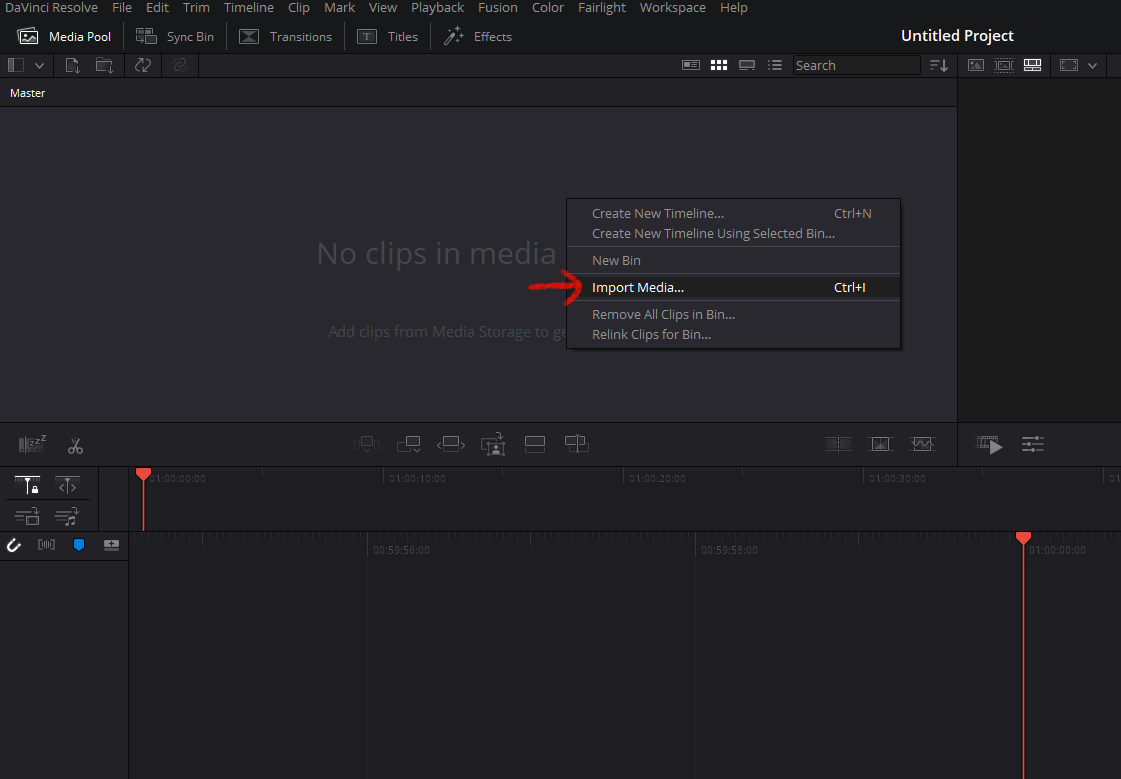
Right click on the media pool and click Import Media (or Ctrl-I) to import your YouTube video file (which you can download using any 3rd party YouTube video downloader/recorder). You may be prompted to change the project frame rate to match the video, we advise to just click 'Change'.
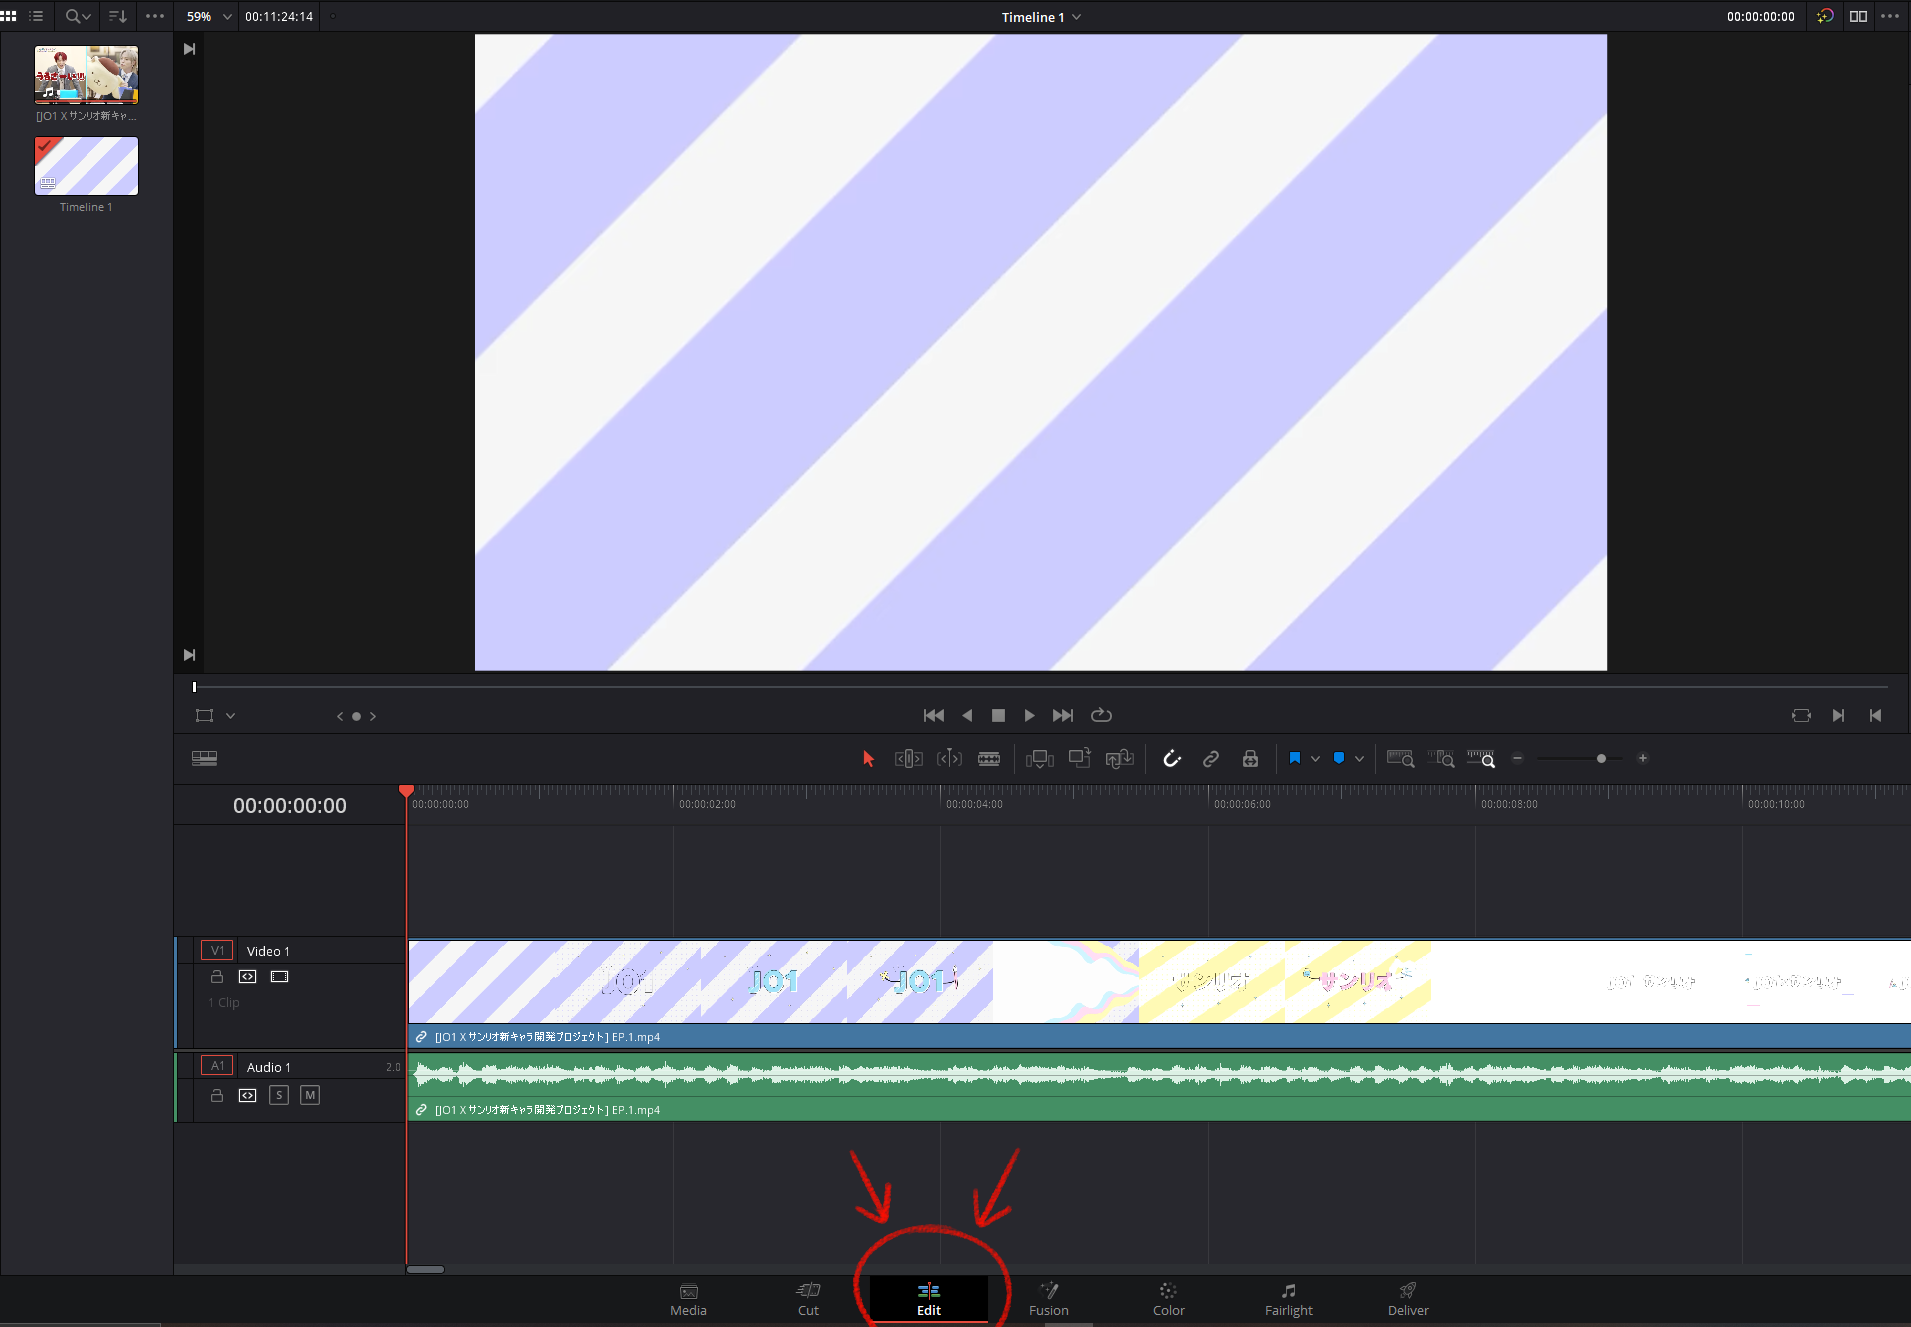
Once your video is in the media pool, simply drag and drop it to the timeline below. Switch over to the Edit tab on the bottom. This is the screen we will be working on to sub!
Step 2: Subtitling
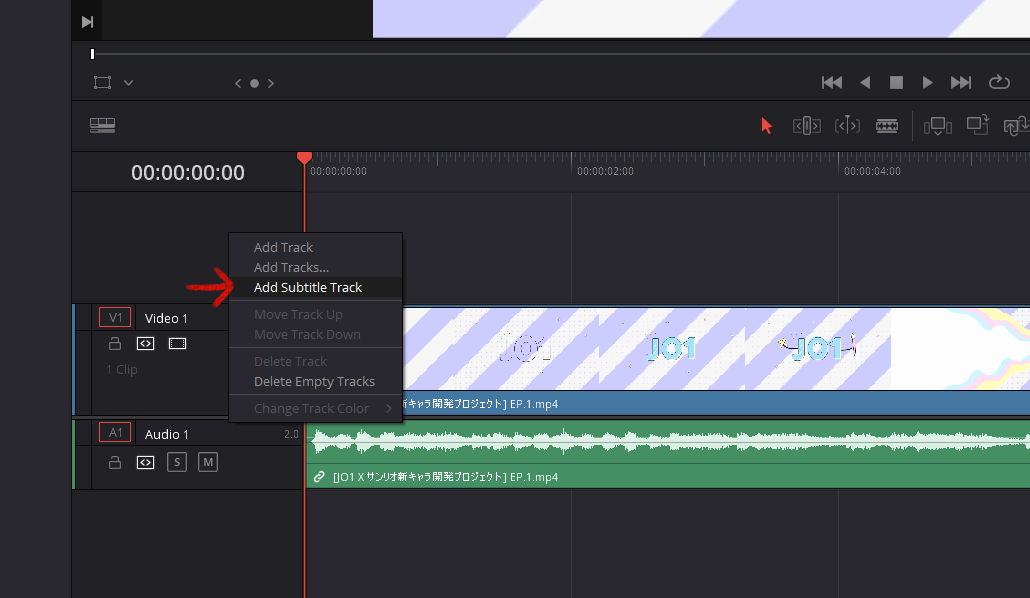
Right click on this section above Video 1, and click Add Subtitle Track. You can now right click anywhere on the subtitle timeline to Add Subtitles!
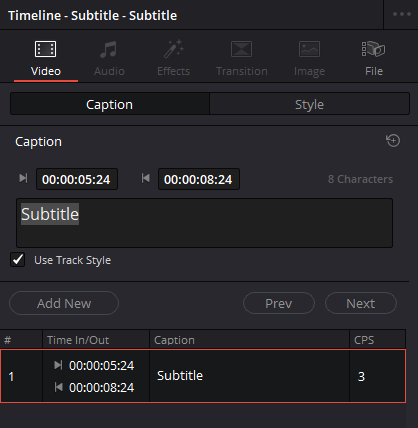
When you click a subtitle block, you will see this section on the right side of your screen, where you can freely input the text for your subtitles. The regular timeline functions work as well, so you can easily drag and adjust the timing of your subtitles on the timeline. In the 'Style'tab, you can change the styling of the subtitles, just to help you see the text better while subbing - the styling does not matter for the actual subtitles because the styling settings will not be saved on export.
Some useful timeline shortcuts are A, which is the regular selection tool you can use to drag stuff around, and B which is the blade tool to slice the subtitle blocks. The snapping & position lock on/off toggles may also be essential to your subtitling process.

Step 3: Exporting
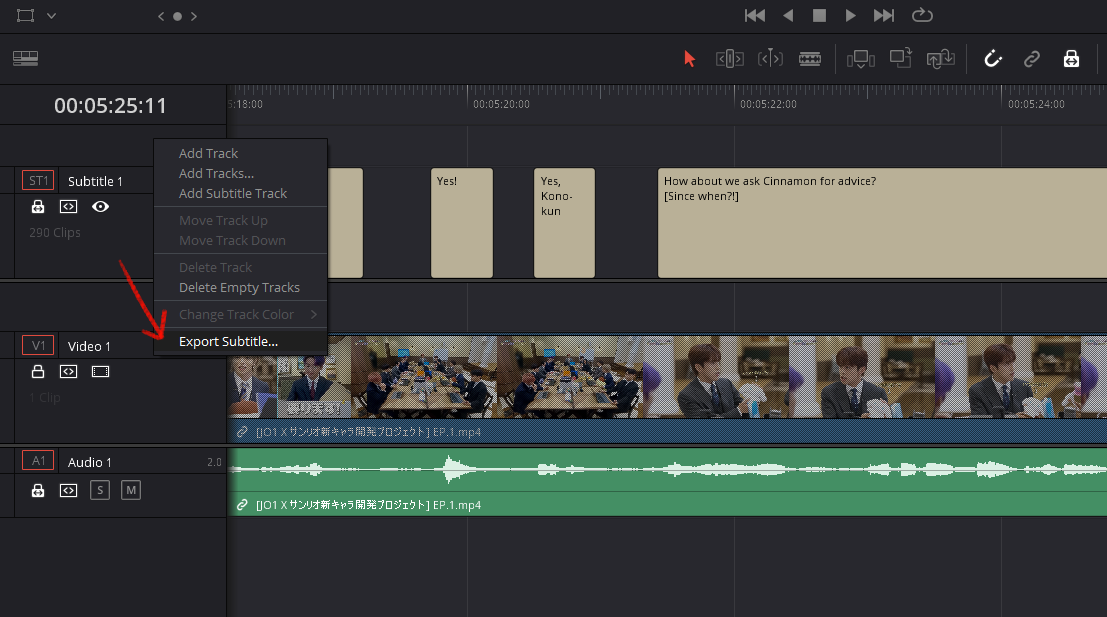
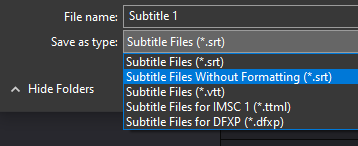
The same way you created the subtitle timeline, right click the subtitle track area (not the timeline) and select Export Subtitle.... Click the file type dropdown and choose Subtitle Files Without Formatting and save the .srt file to your desired location and you're done!